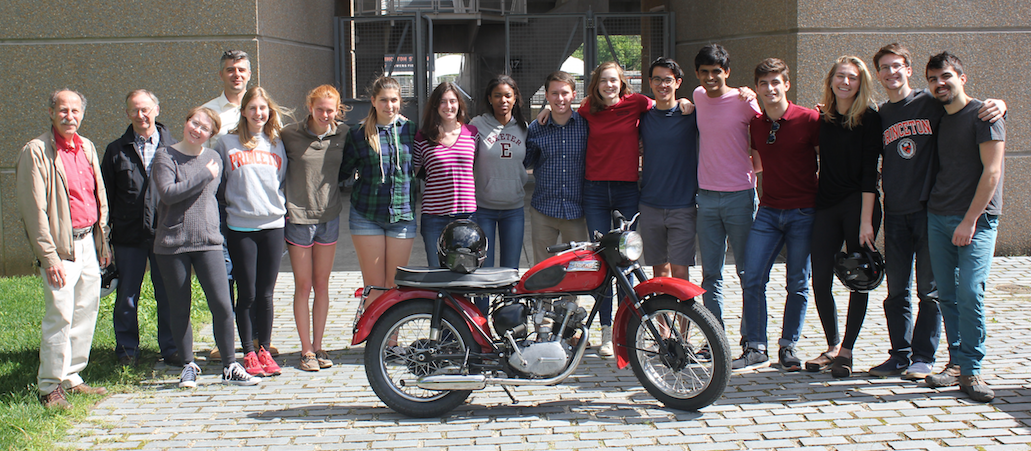
The Class of 2016 - 2017
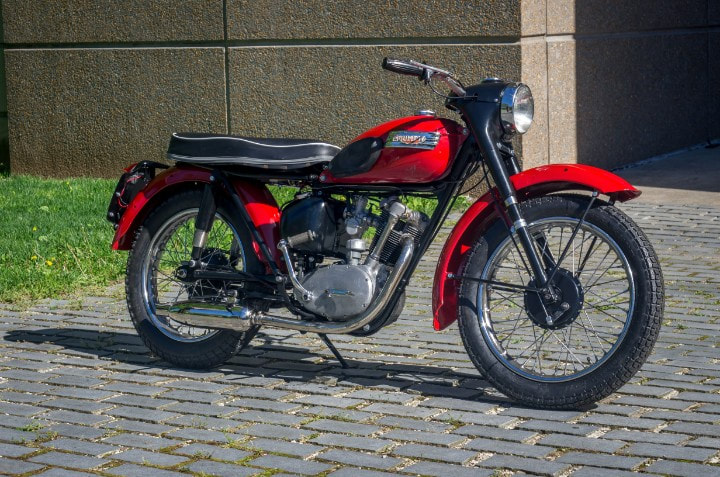
Project - 1958 Tiger Cub
Project - 1958 Tiger Cub
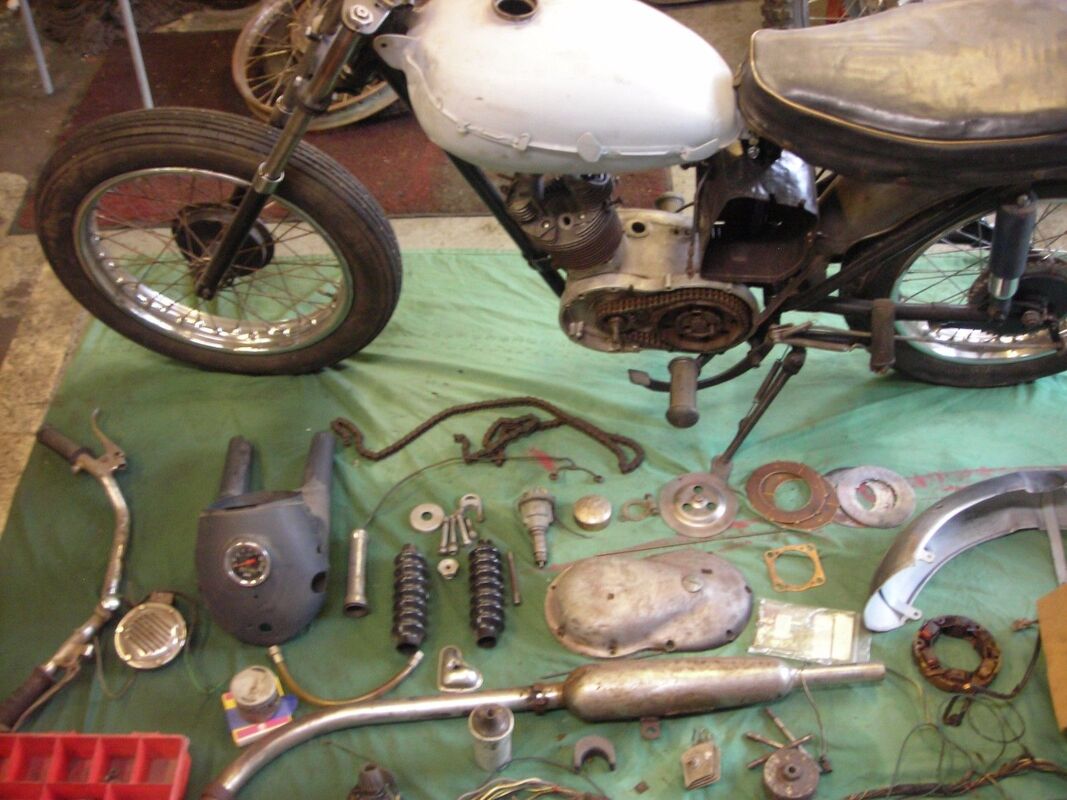
The start of the project, as found on eBay.
|
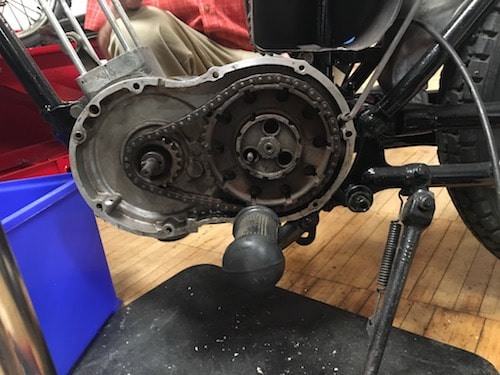
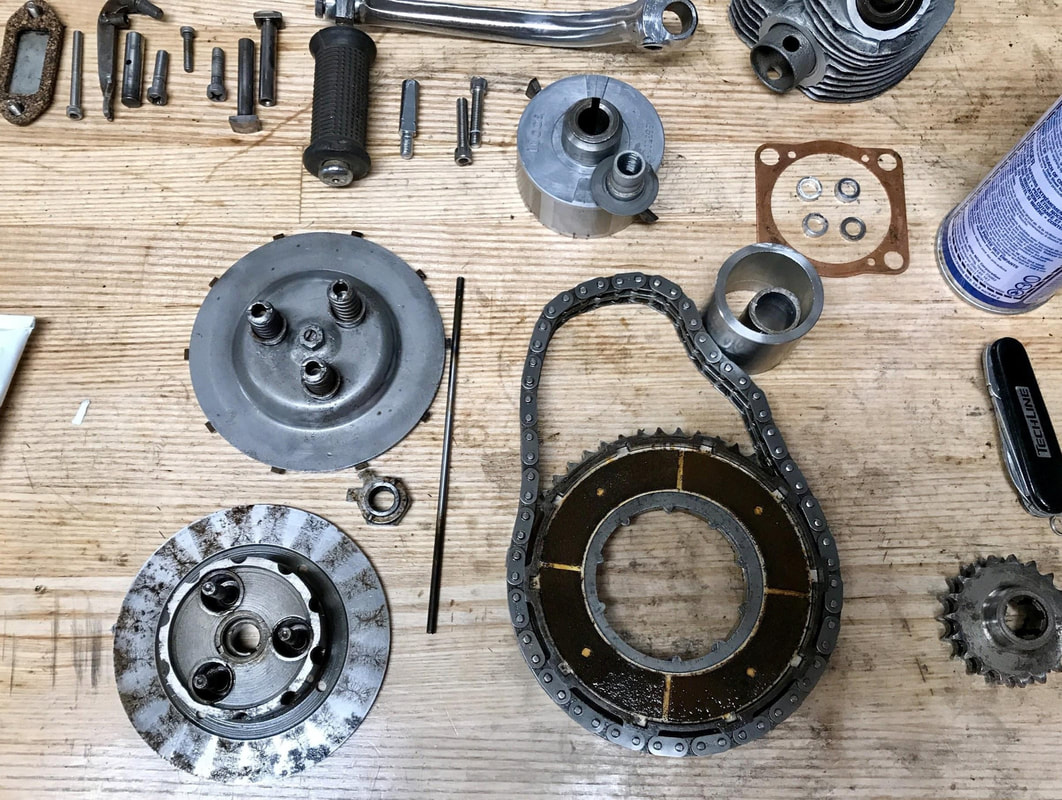
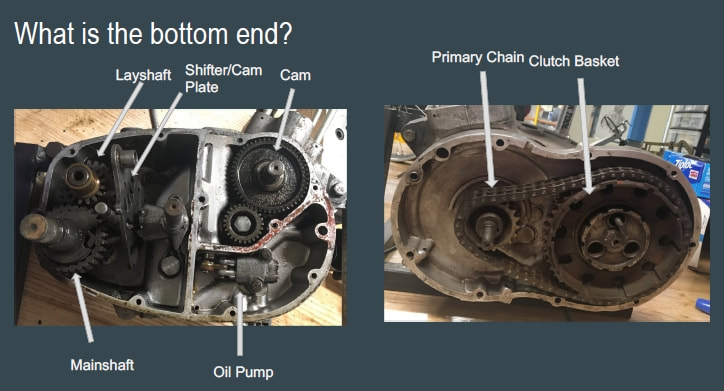
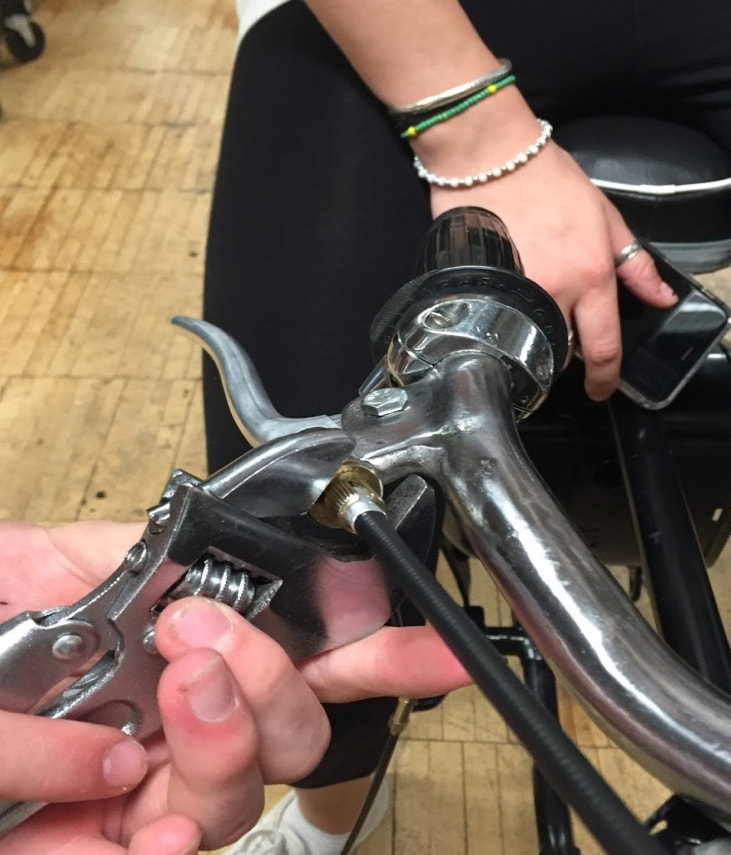
Clutch and Oil lines
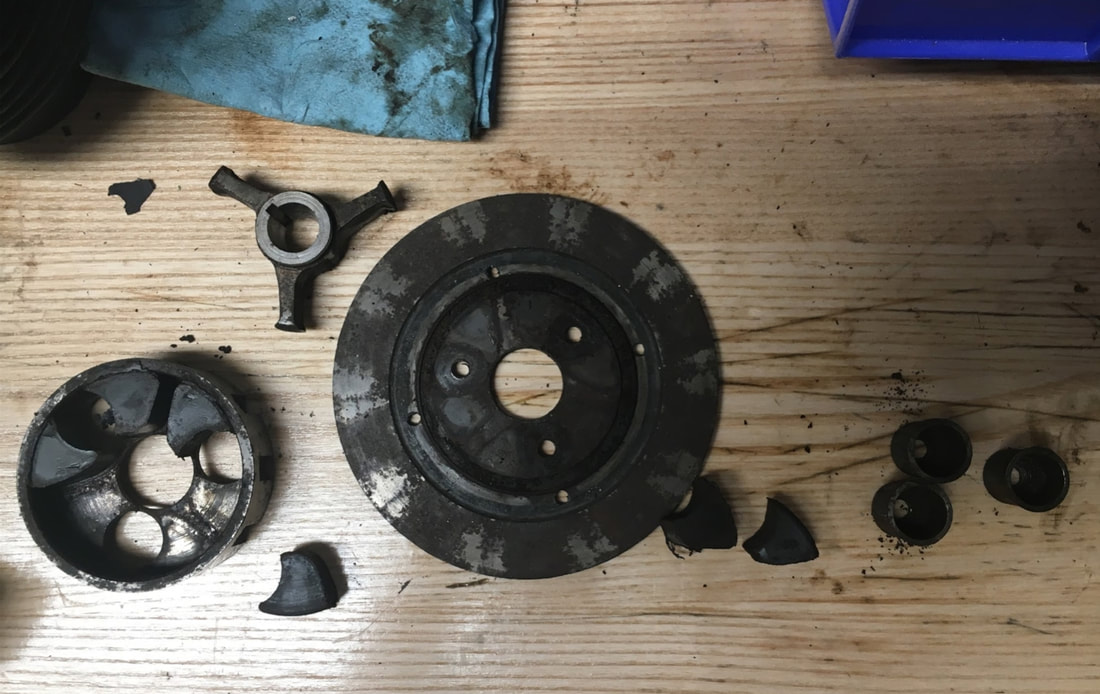
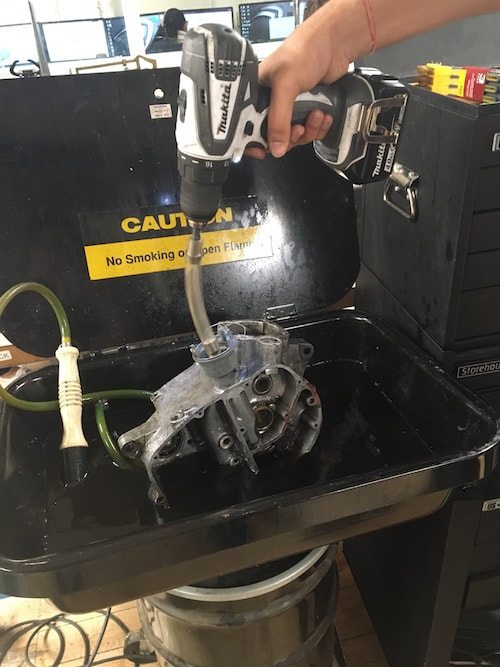
Ben and Theodor This list is certainly not meant to be exhaustive; rather, it is a starting place of potential issues you might run into. Every bike is different, but these were the challenges we faced on ours. The clutch, as it came to us, was incomplete; it was lacking a full set of driven and friction plates and had springs in very poor condition that needed replacing. Additionally, the duplex chain was overstretched and caused significant energy loss, not to mention wear inside the case. To anyone who might be working on these clutches in the future, be sure that the duplex chain is making contact with all of the teeth of both sprockets. Backplate assembly: has rubber parts that protect against internal shocks between the rotor and the plates. Severely degraded in condition, so we dissected it - it's usually assembled as an entire unit. Our work was more complex than this, but it broadly fell into five large task areas. Each step was necessary to ensure that the clutch would function when we put it back on the bike. Our project lasted about twelve weeks, although we worked on other systems as well. Here you can see all of the clutch components disassembled; each has been cleaned thoroughly and replaced if necessary. Once the clutch was reassembled and placed back on the bike, it worked like a dream, aside from slippage due to issues with having tightened the clutch springs without lubrication. But when the bike was up and running, we were able to tune it to make sure it would not slip. Most of the work we did on the oil system involved ensuring that the passages were clear and that the oil could flow freely. Because some of the components, namely the oil lines feeding from the bottom end into the reservoir, were worn out, we had to fabricate new parts. Bottom End group testing (and cleaning!) the oil pump by running it in the parts cleaner using a hand drill The creation of new oil lines was simple, as it primarily involved bending copper tubing to match the previous specifications. Additionally, we worked to make sure the engine was leak free (or at least had as few leaks as possible- these bikes love to sweat!). |
|
|
Bottom End
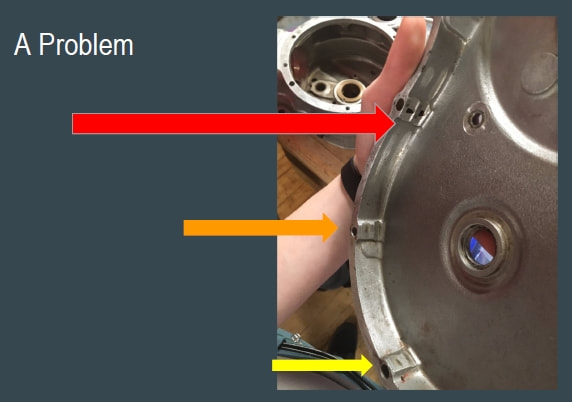
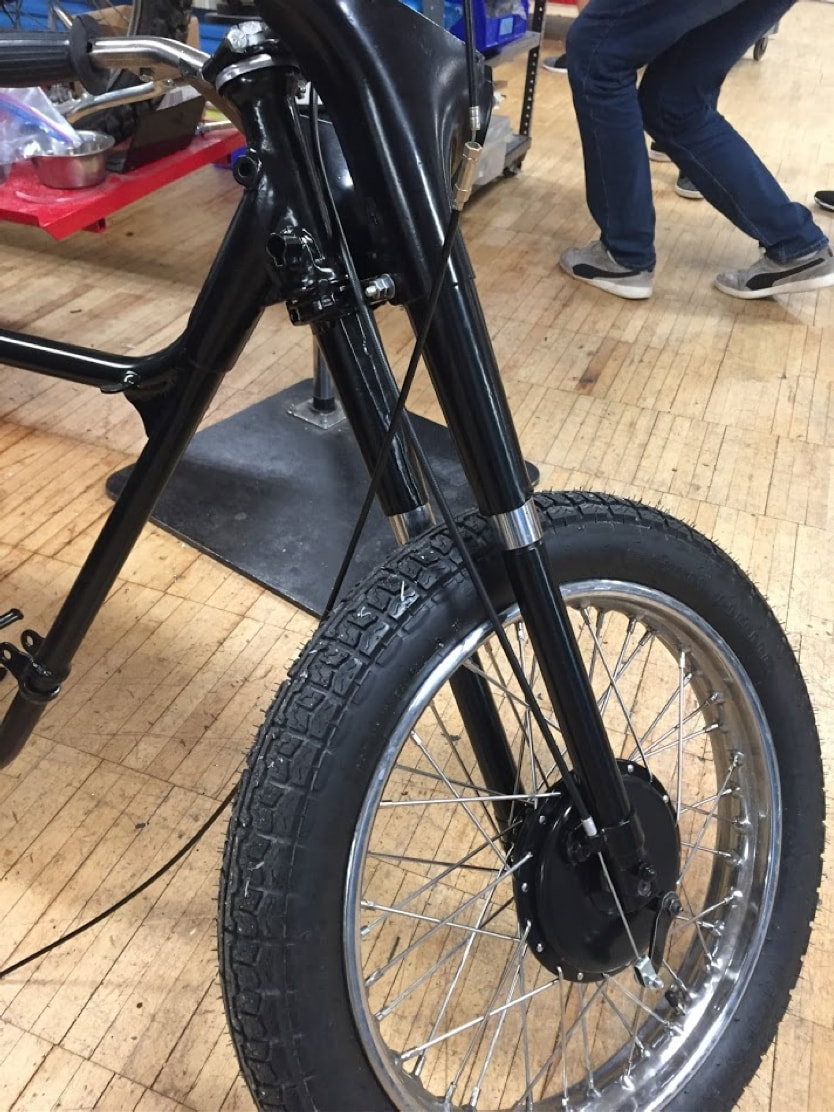
Alexandra and Divyanshu A problem - We noticed that parts of the engine cover had been worn away, which led us to believe that in the past, the motorcycle was run with a loose chain that rubbed continuously against the case and wore away the material. The subsequent holes were problematic, as they would lead to severe oil leakages if left. 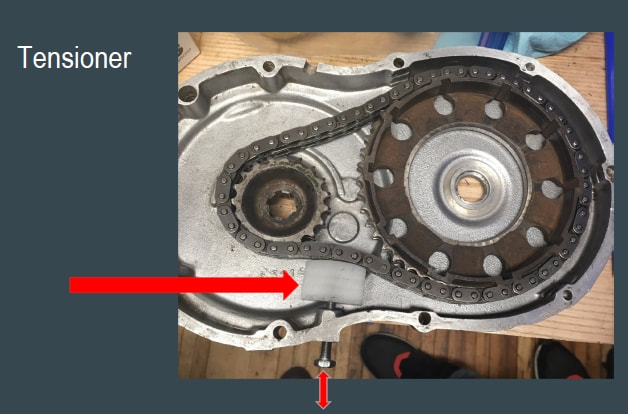
|
To solve this problem, we replaced the chain and built a tensioner using CAD and then a CNC machine to keep the chain from hitting the side of the case if it ever became loose.
The screw attached to the tensioner can be moved up and down in order to adjust the tension in the chain, ensuring it stays away from the cover even as it stretches more and requires the tensioner to take up more slack.
The screw attached to the tensioner can be moved up and down in order to adjust the tension in the chain, ensuring it stays away from the cover even as it stretches more and requires the tensioner to take up more slack.
Top End
Julian and John
Julian and John

|
|
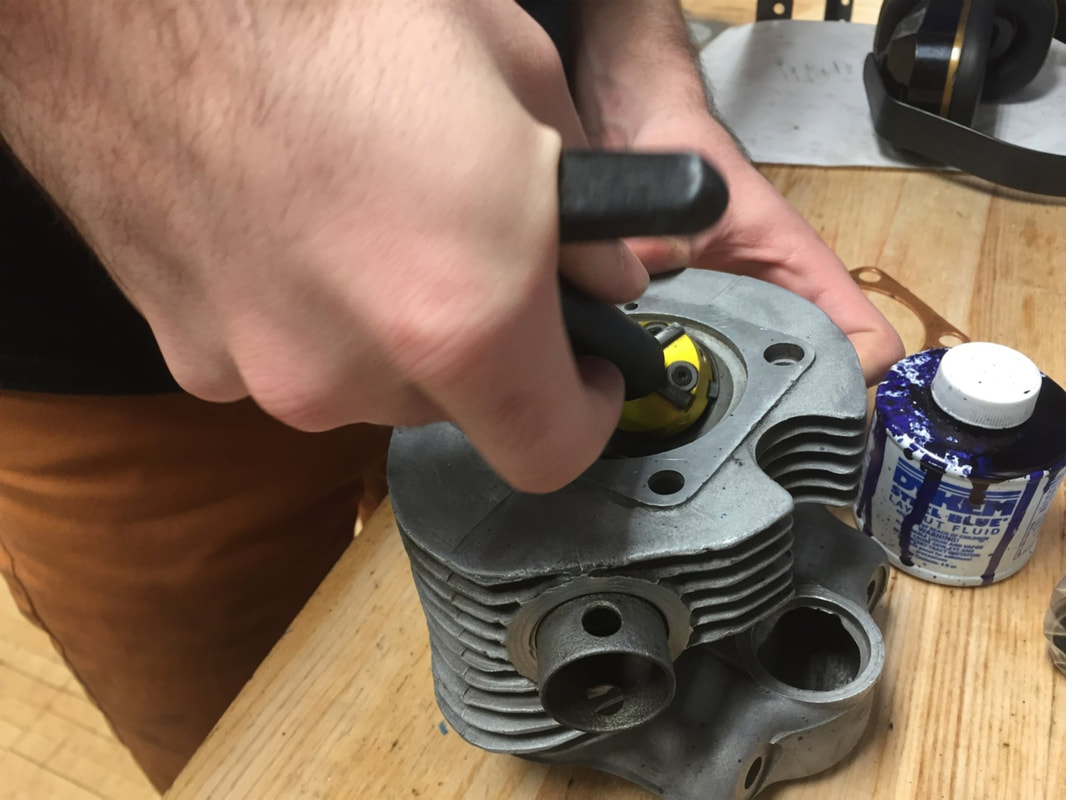
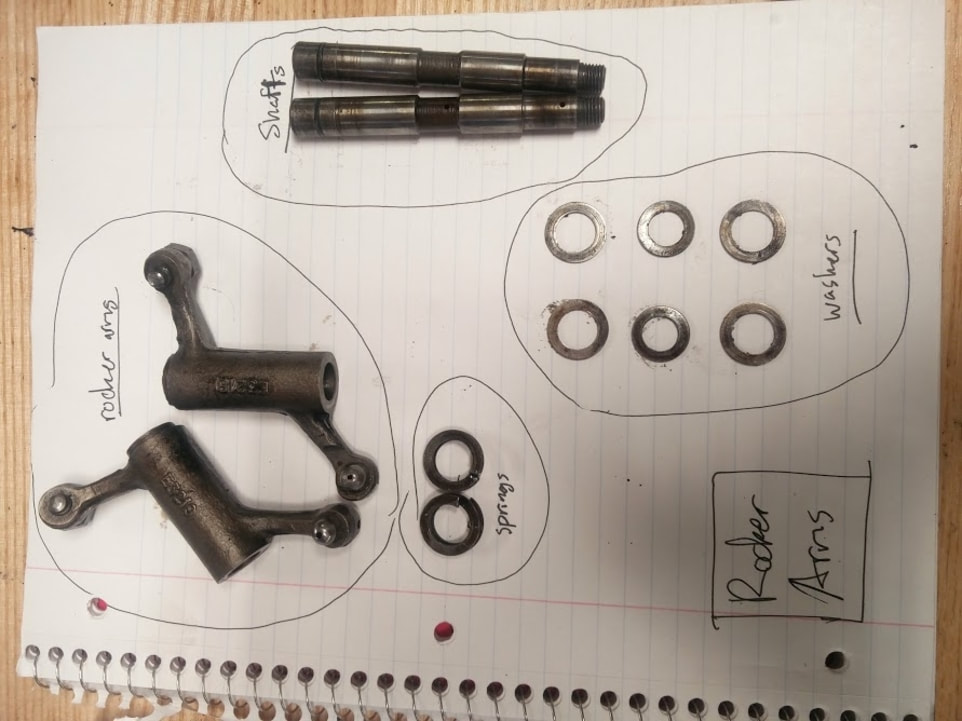
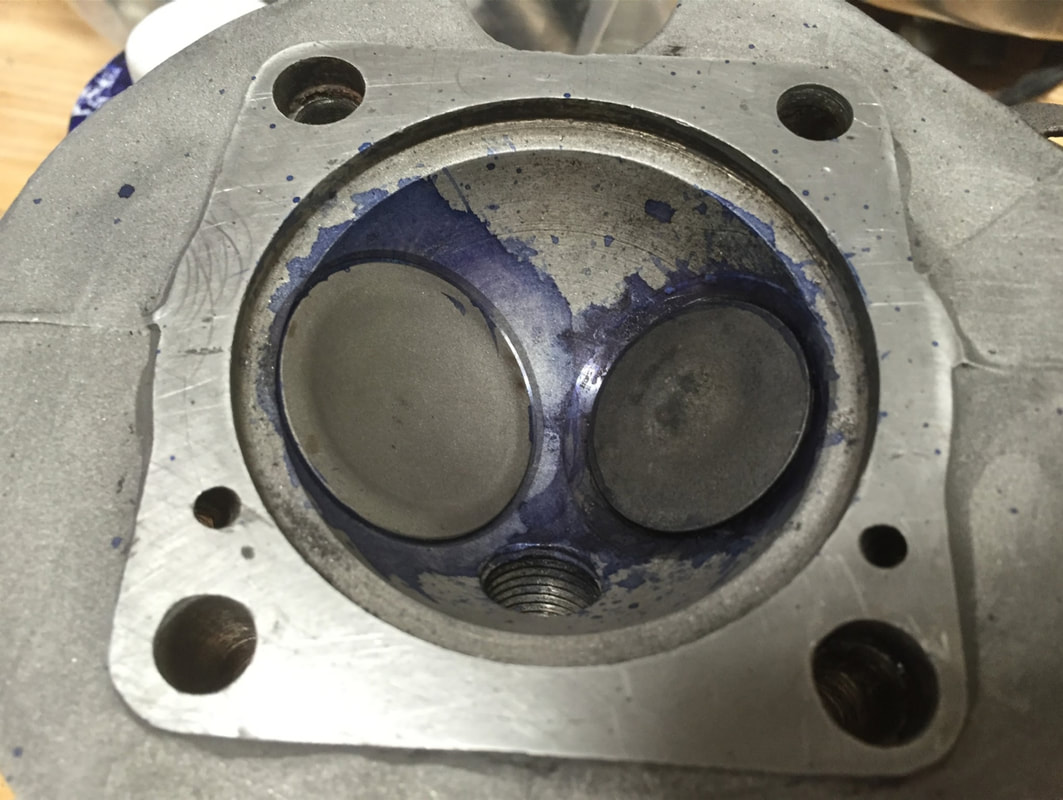
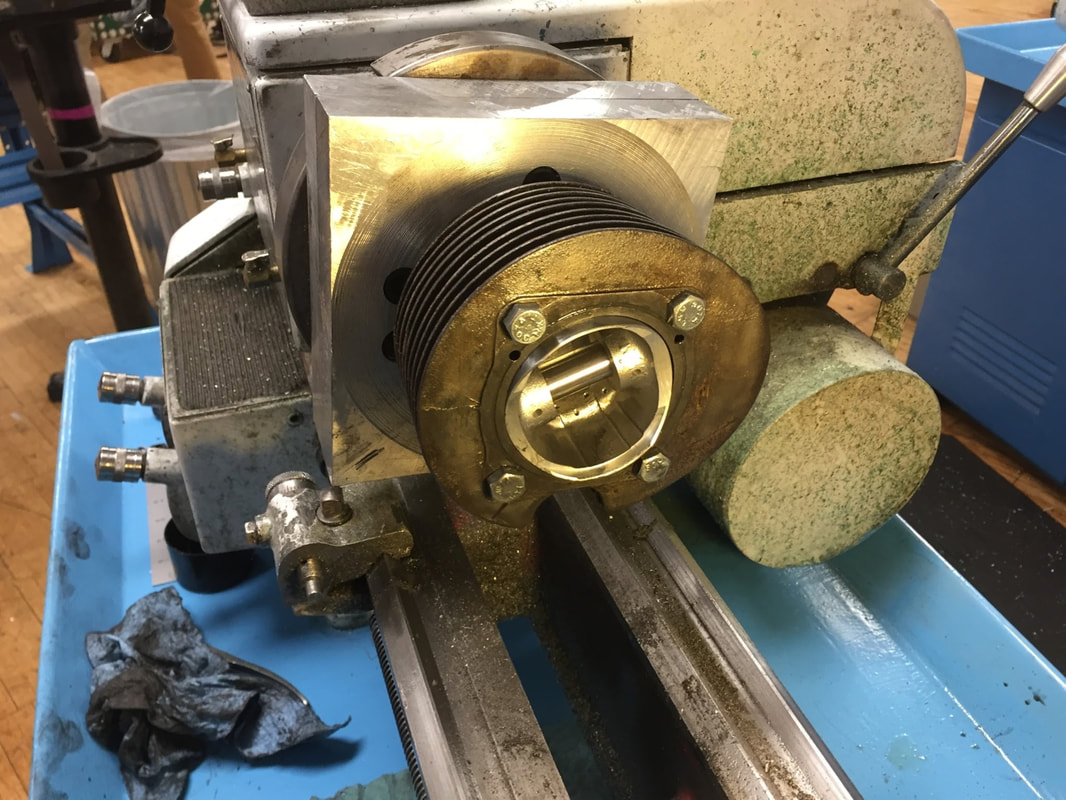
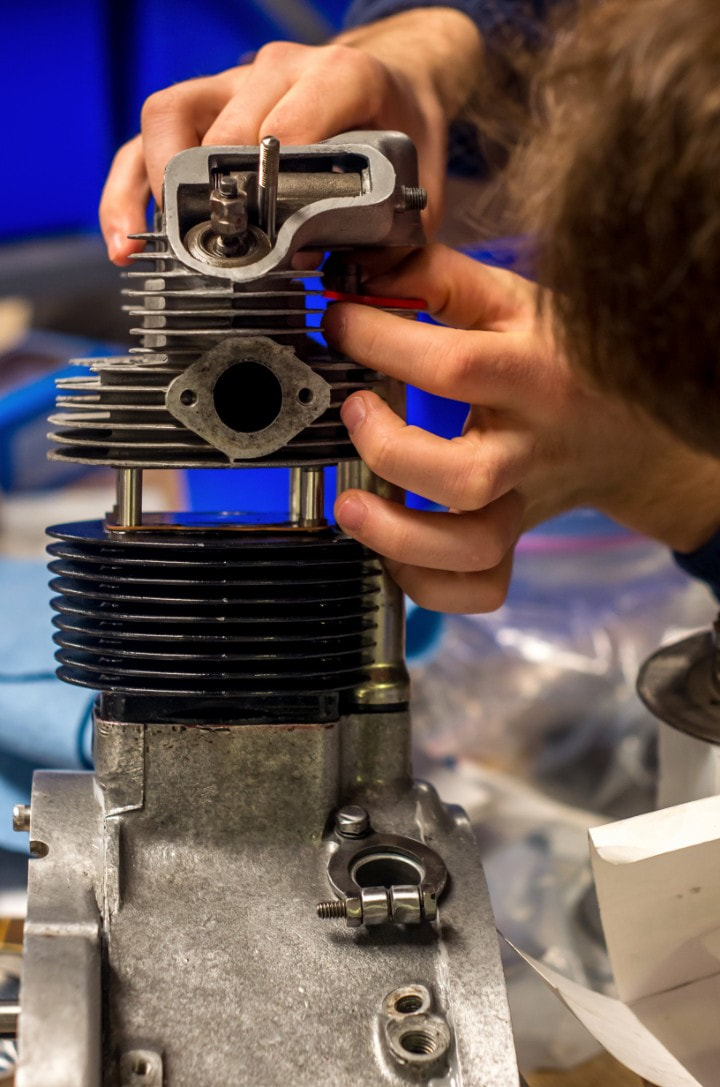
The cylinder head was fully stripped, sandblasted then the valves were reground and the valve seats were re-cut.
We tried to 3D scan the existing valve cover and make a model in CREO but it did not work, so instead we took measurements of the valve cover and made another model in CREO to make on CNC.
We tried to 3D scan the existing valve cover and make a model in CREO but it did not work, so instead we took measurements of the valve cover and made another model in CREO to make on CNC.
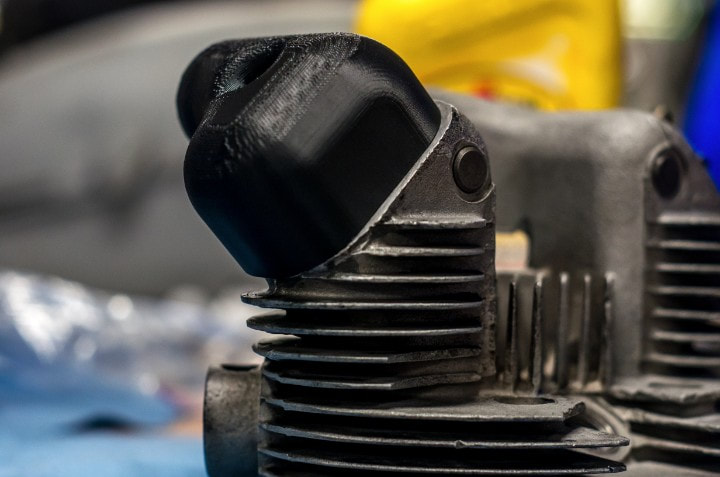
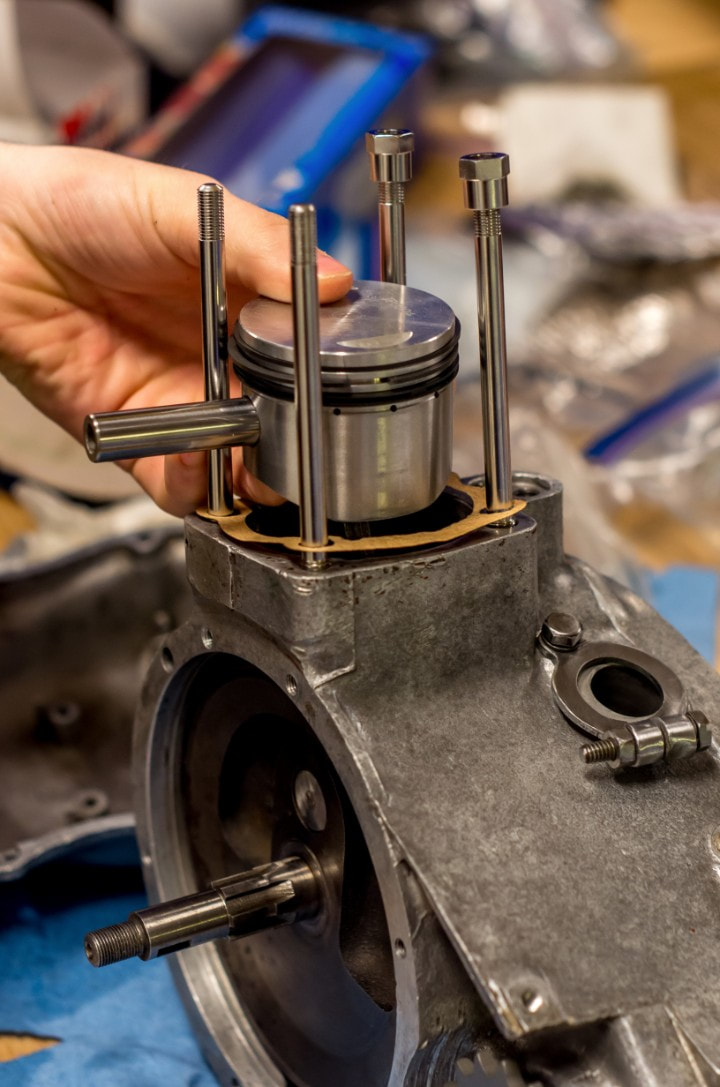
Finally, the barrel was re-bored to take a +0.030" oversize piston.
|
|
|
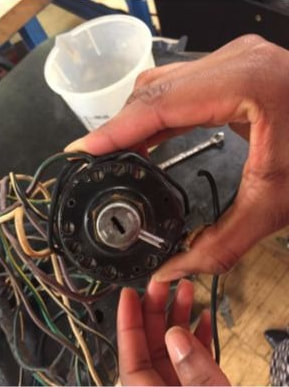
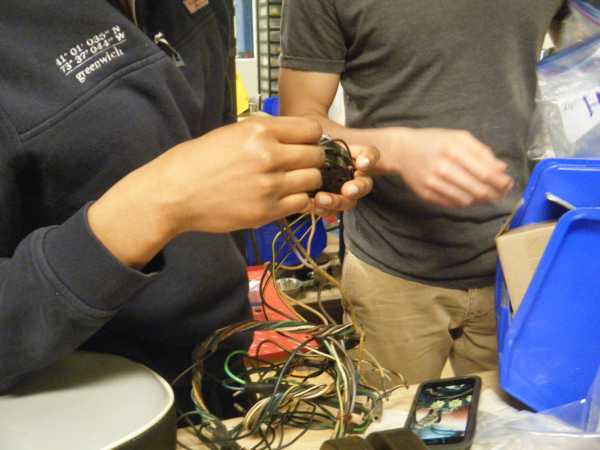
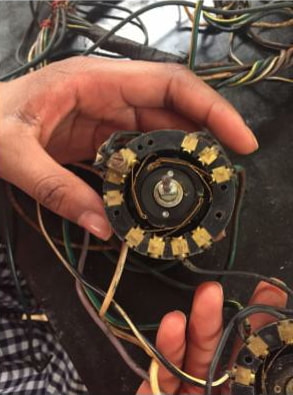
Electrical
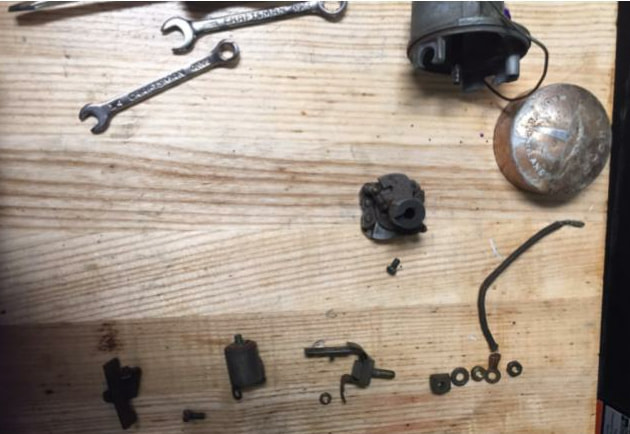
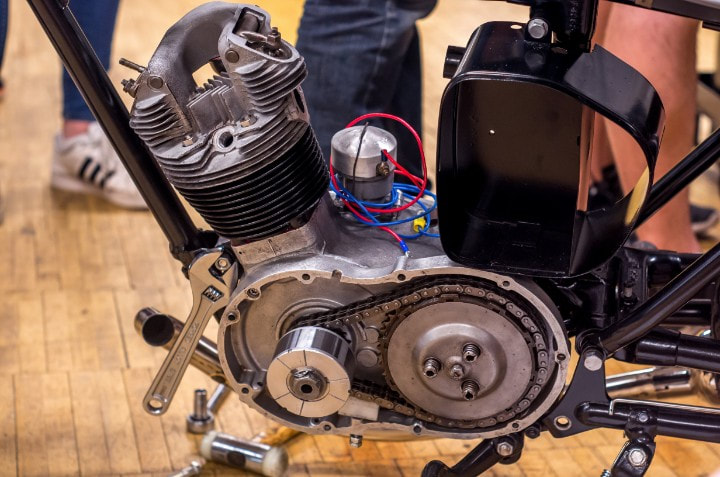
We did not do too much for this system. But the stator was not fitting in the engine case as the case was made for an older stator. So we ground down one of the pegs in the casing to allow it to fit. We took apart the distributor testing if the springs worked and if the capacitor worked on an oscilloscope, and they did. |

|
|
|
|
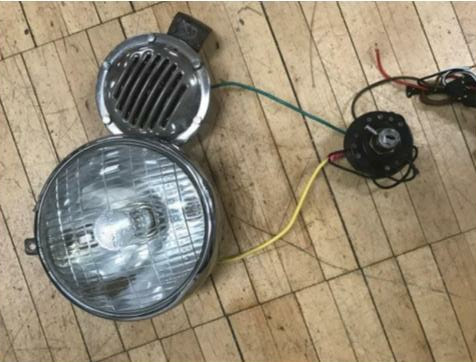
The headlamp and horn are more peripheral in the electric system.
We searched Ebay for an original Lucas headlamp and the horn came on the motorcycle to start. We just took them apart and cleaned them. The switch was tedious to take apart, it originally was not turning so we took it apart and cleaned it soaking it in acetone. We make the mistake of not taking good pictures of the wiring, so we struggled for a long time to put the wires back. In the end the real issue wasn’t gunk inside the switch but and external bent metal plate. We unbent it and it worked. We were given a given a wiring harness made for and ET system and converted it to be used for our battery based motorcycle. |
Shock Absorbers
Our shocks were what are called twin-tube shock absorbers. They function to dampen because they have two cycles, compression (as the piston moves downward) and extension (as the piston moves upwards).
Compression is “easier” than extension, which helps eliminate bounce, effectively dampening the impact. The spring sits around the inner tube and inside the outer tube of the twin-tube shock-absorber, and supports the vehicle’s weight as the shock absorber dampens.
|
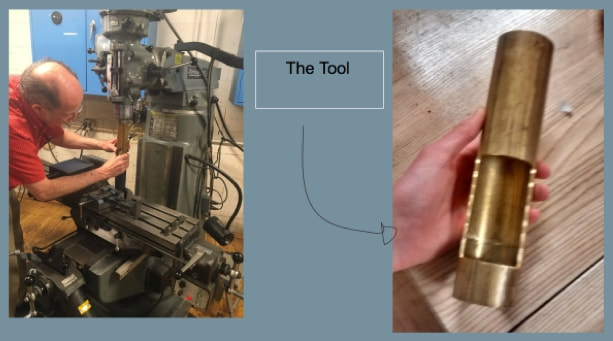
We had to machine our own tool to disassemble the struts, because this is the first time in this course that we have restored the struts instead of just buying replacements.
After doing some research online, we decided that the best method would be to create a tool which would rest on the washer on top of the spring when the struts were held upside down. We would then use the milling machine to press upon the tool, thereby compressing the spring and allowing us to remove the aluminum clamps which held the spring in place. |
|
This would free the spring, washer and of course, the two clamps we would remove. Then we would be able to check the dampener and be sure that it was still functional.
We found a brass tube that was the same diameter as the washer so that we could compress the spring by pressing down on the tube. We then used the Milling machine to create a whole in the side of the brass tube that was large enough to remove the clamps through, but was not big enough to damage the structural integrity of the tool.
We had to be careful about this because if the tool were to fail when we were using it to compress the spring, it would have been very dangerous.
Luckily, it was a successful and safe operation, and the dampeners were functional. So our only task was to paint the dampeners and polish the clamps, and then reassemble using the same tool and the same process (just in reverse this time).
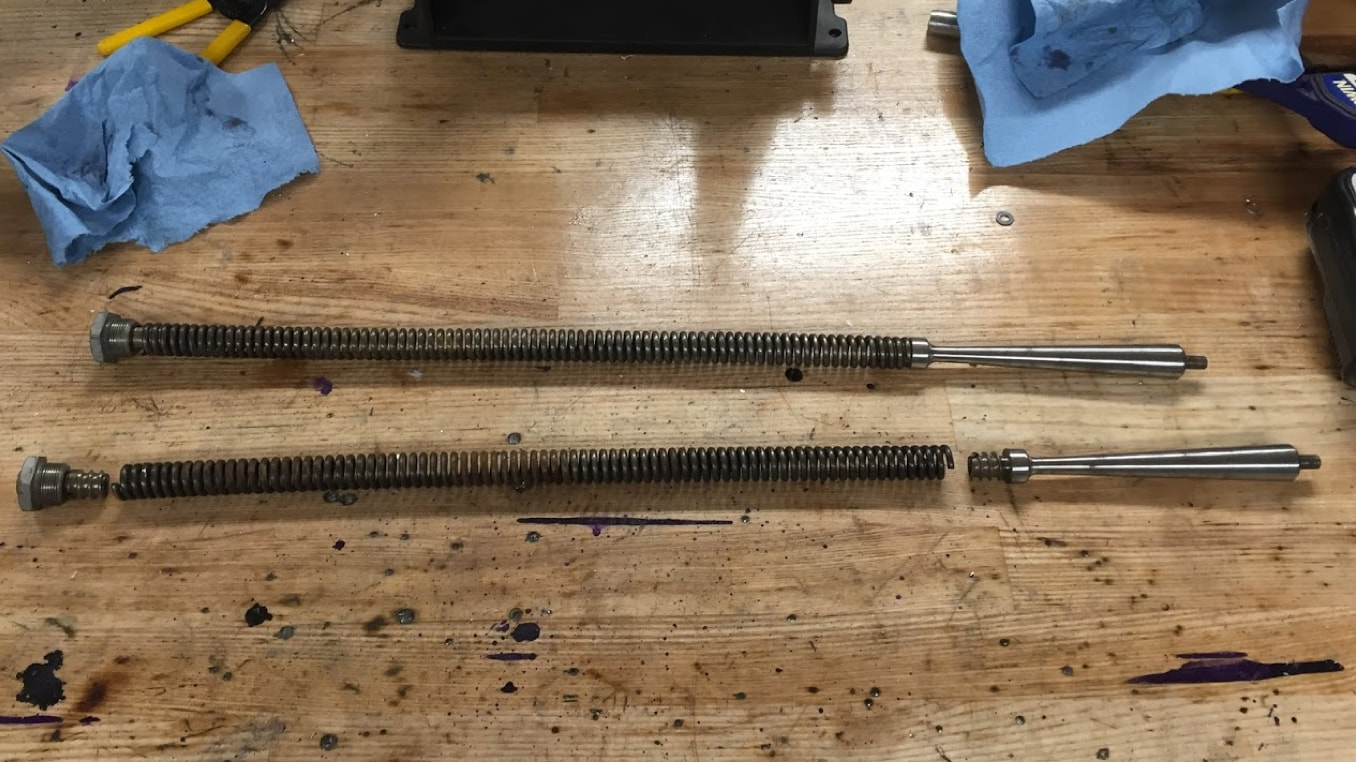
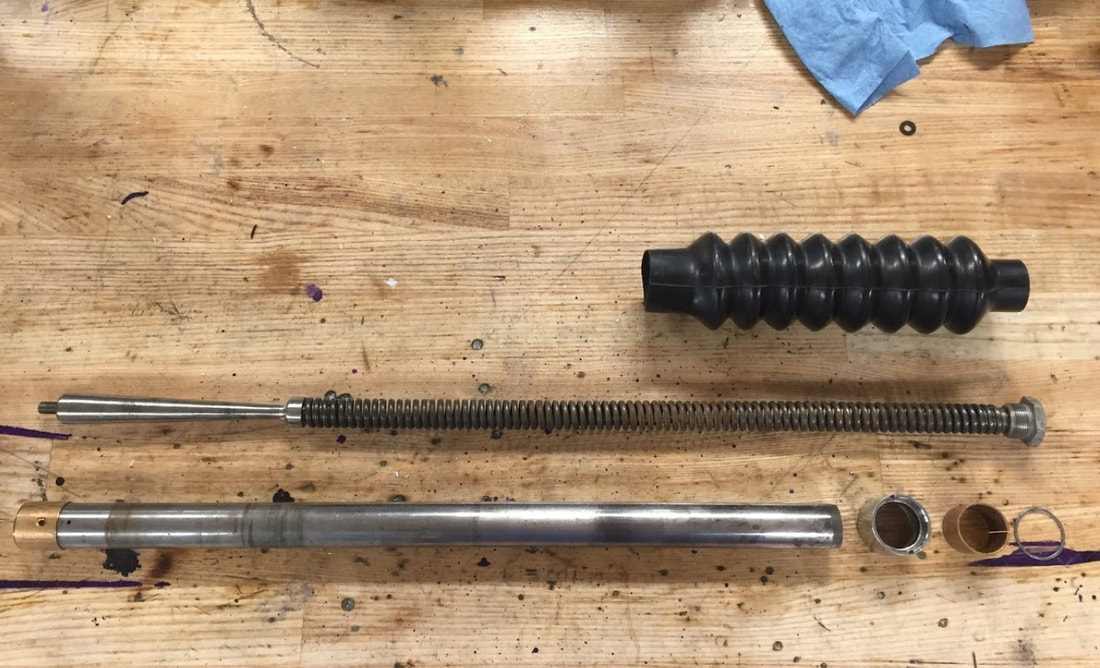
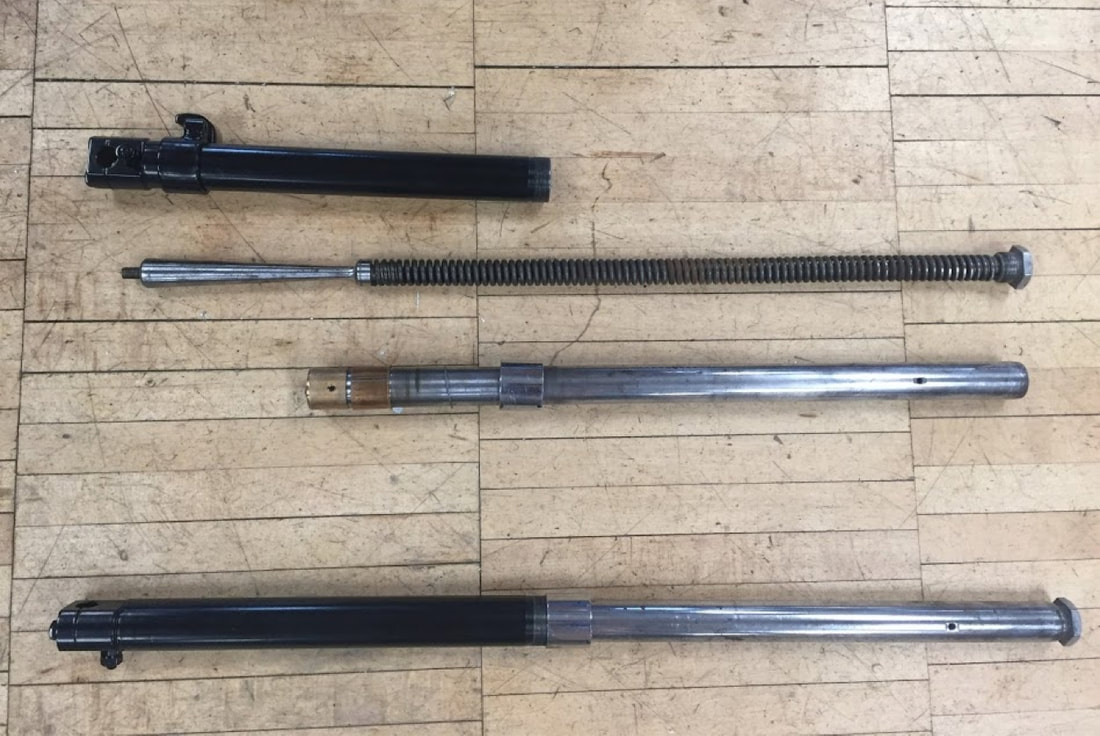
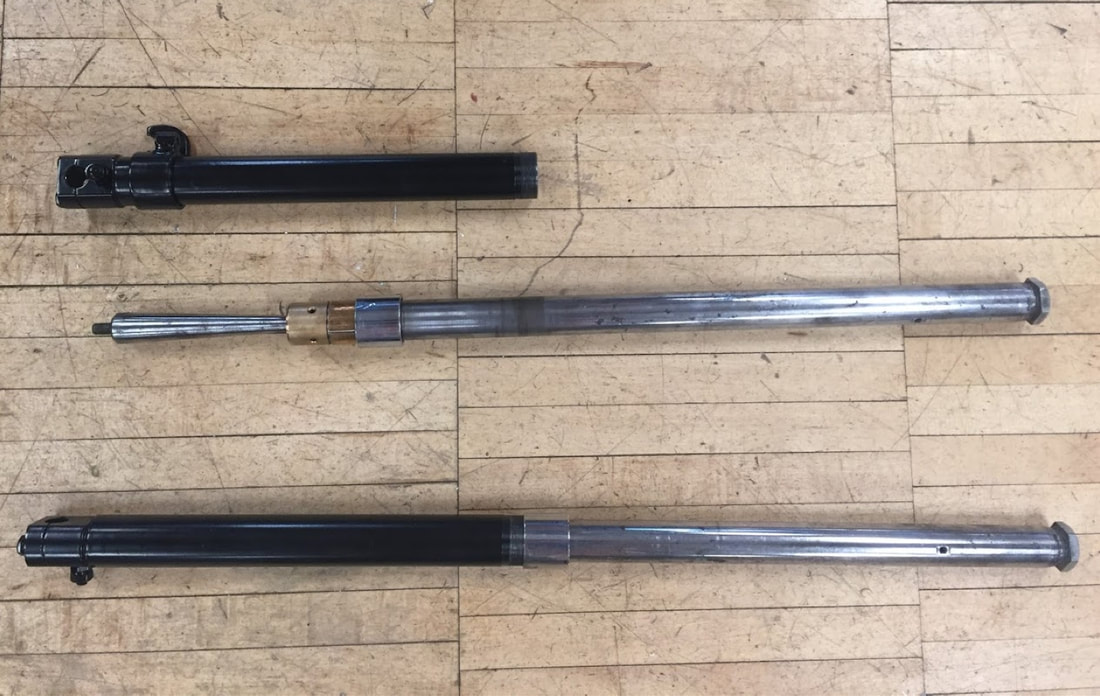
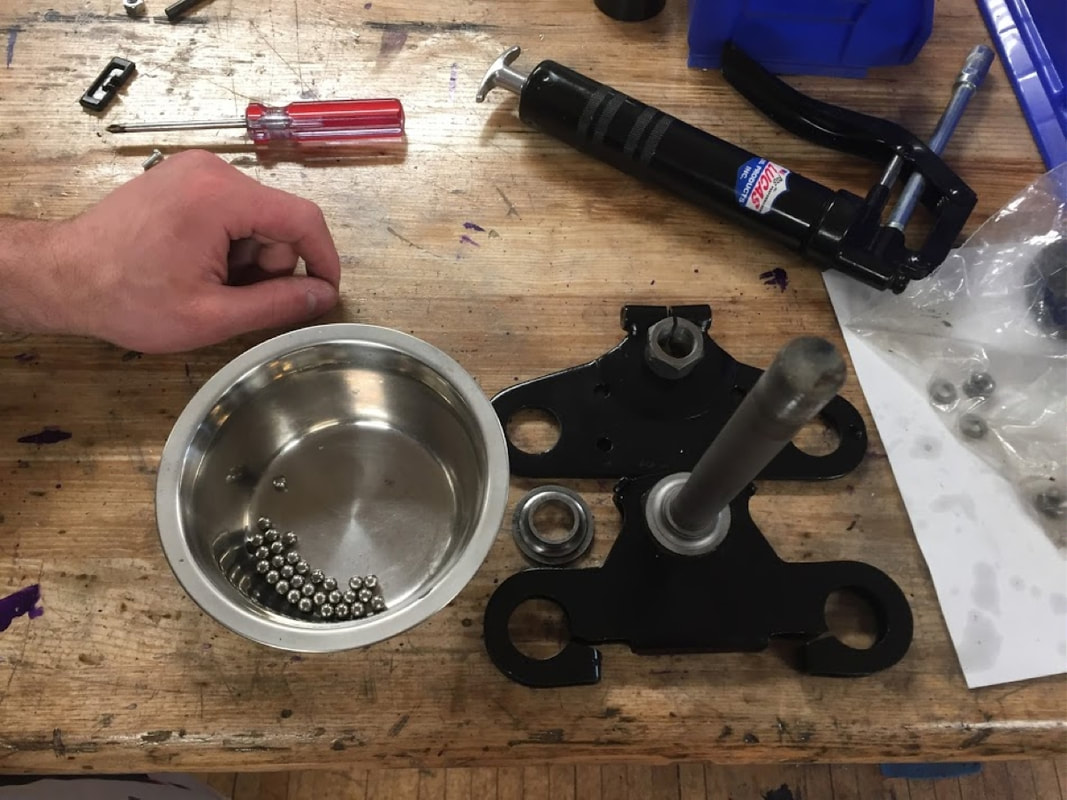
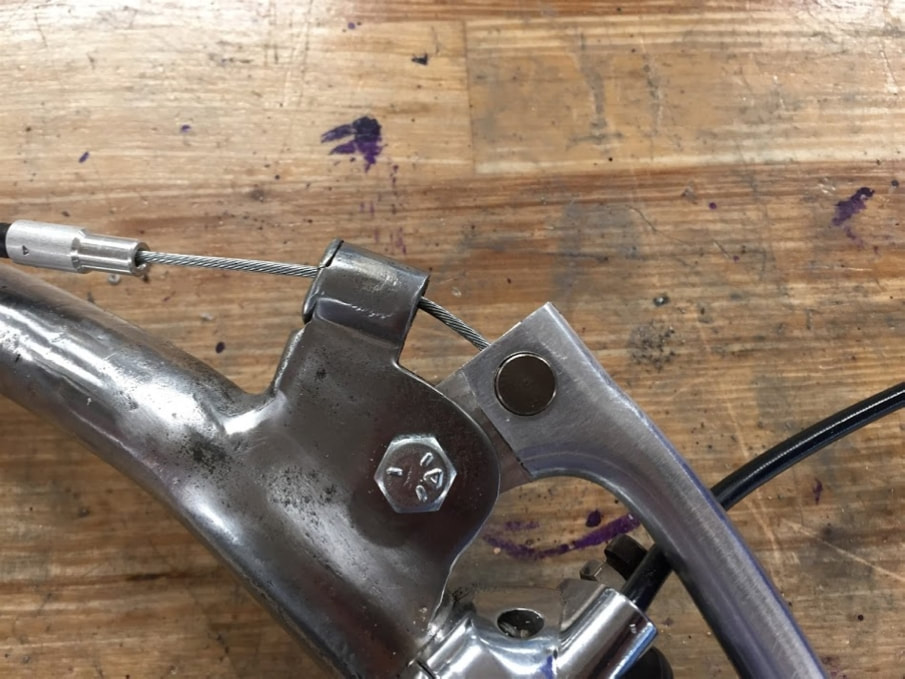
Forks, Handlebars, and Cables
Steven and Matthew
Steven and Matthew
|
|
|
Fork strip and rebuild
|
|
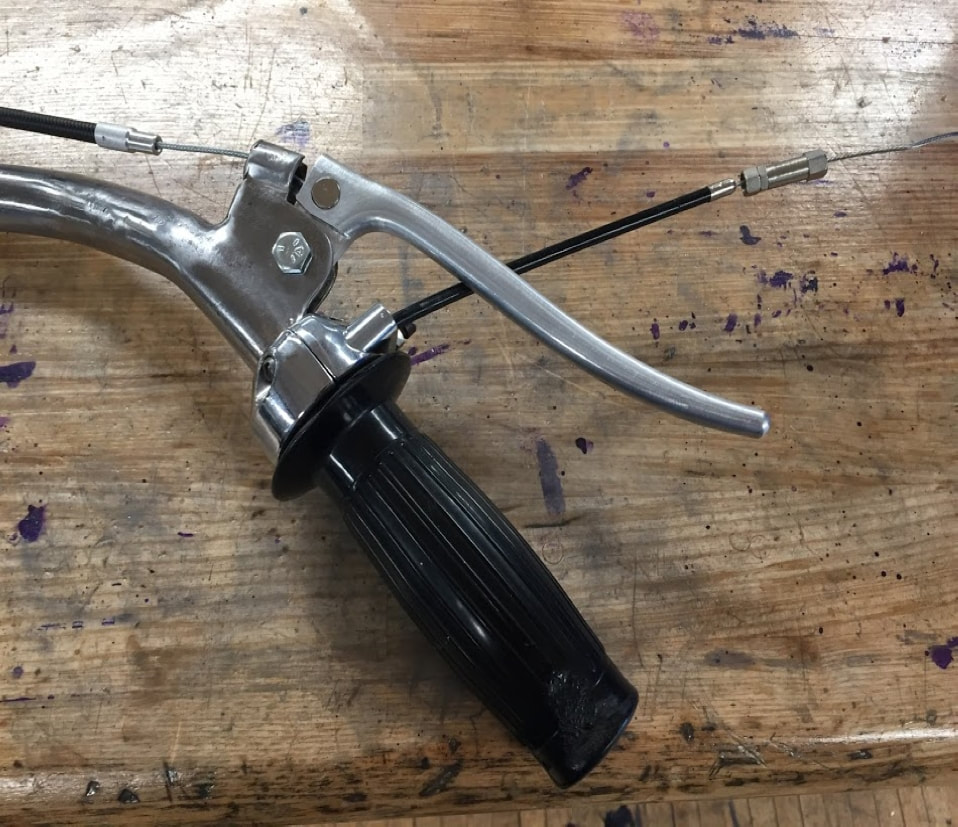
Brake adjuster not installed - once it is installed, the adjuster will screw into the hole through which the cable is passing.
As a result of tension from the adjuster and the drum brake attachment, the cable will become taut. Thank you to Glenn for manufacturing these handle levers! The adjuster is being installed (brass piece). It can be retracted and screwed in tighter to ensure tension in the brake cable. Shout out to Littman for the bomb handlebar mounts. 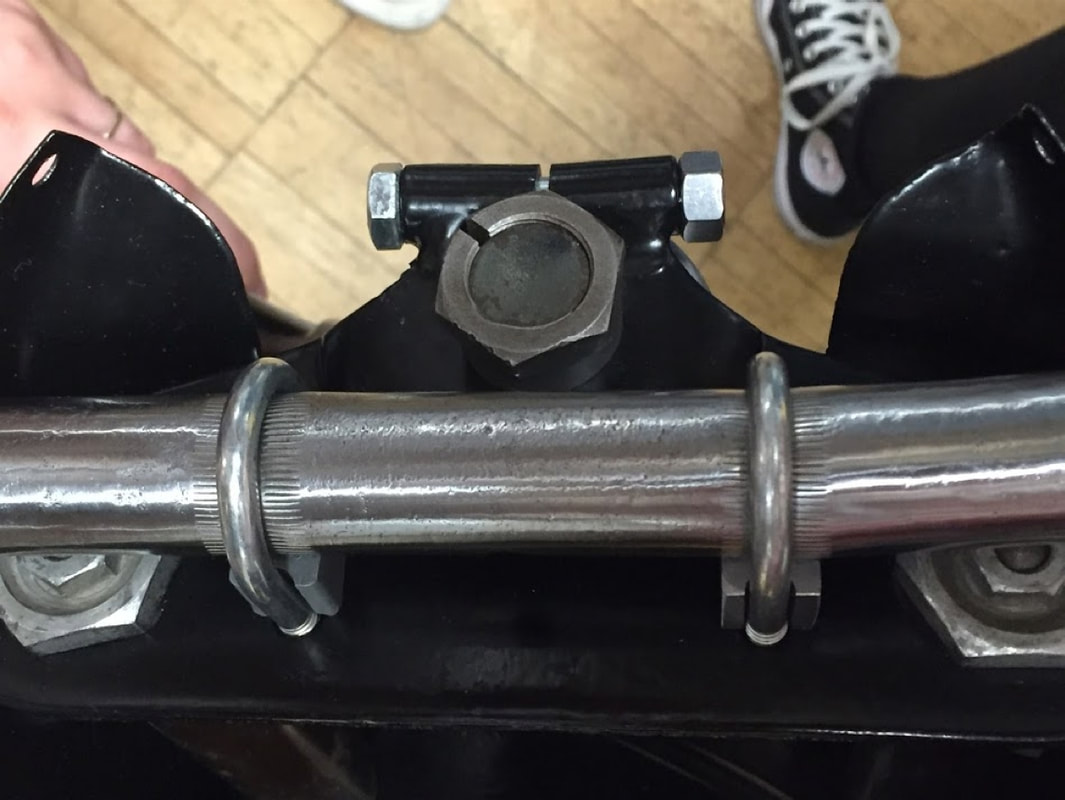
|
Brake Levers and Adjusters
|
Forks in and brake cable attachment to drum.
|
|
|
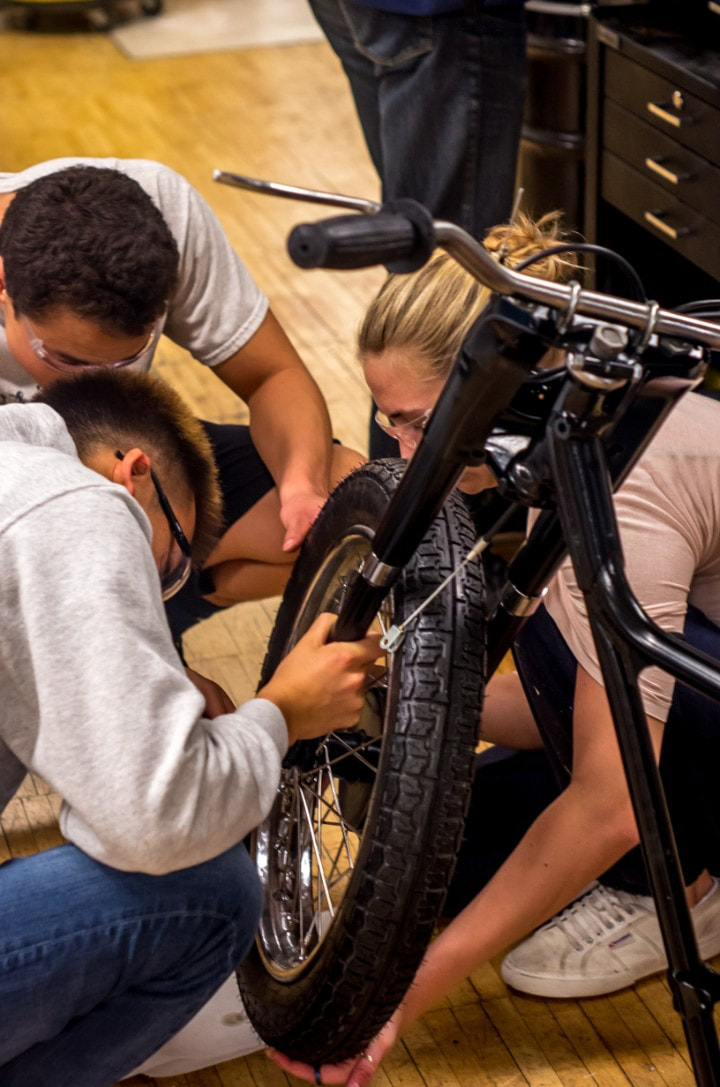
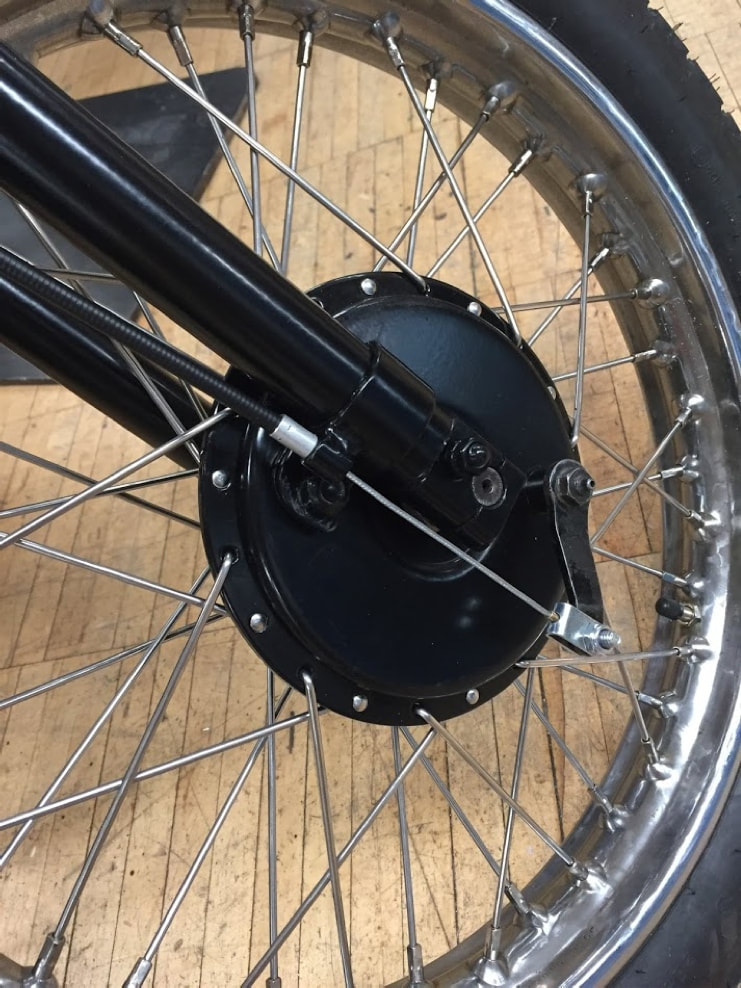
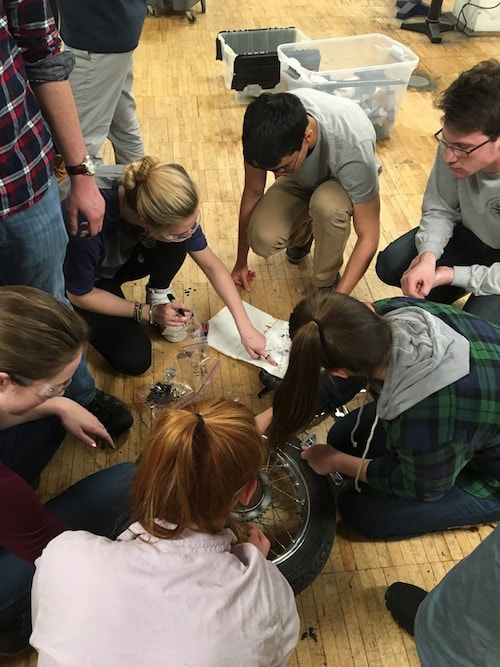
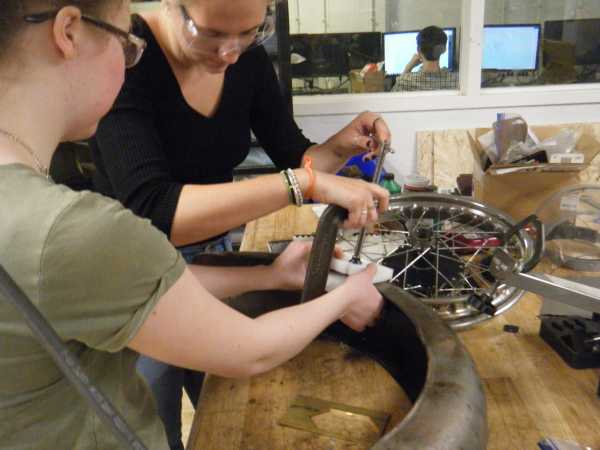
Wheels
Sydney and Rachel
Sydney and Rachel
|
We started with removing the tires and the brake shoes.
We then cleaned the wheels before stripping out the spokes and nipples. 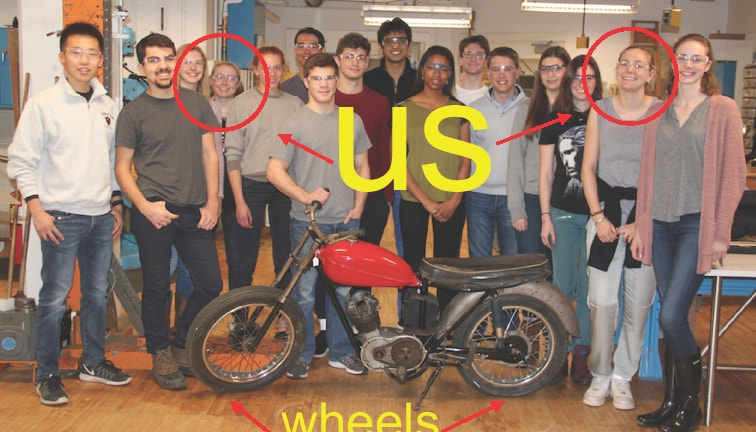
|
|
|
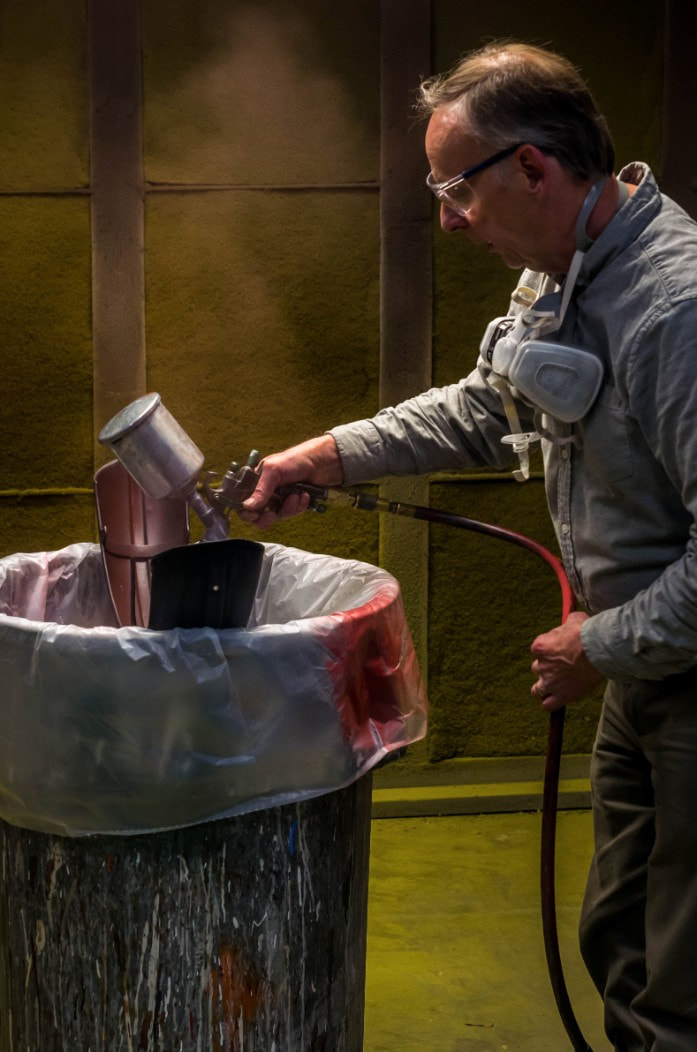
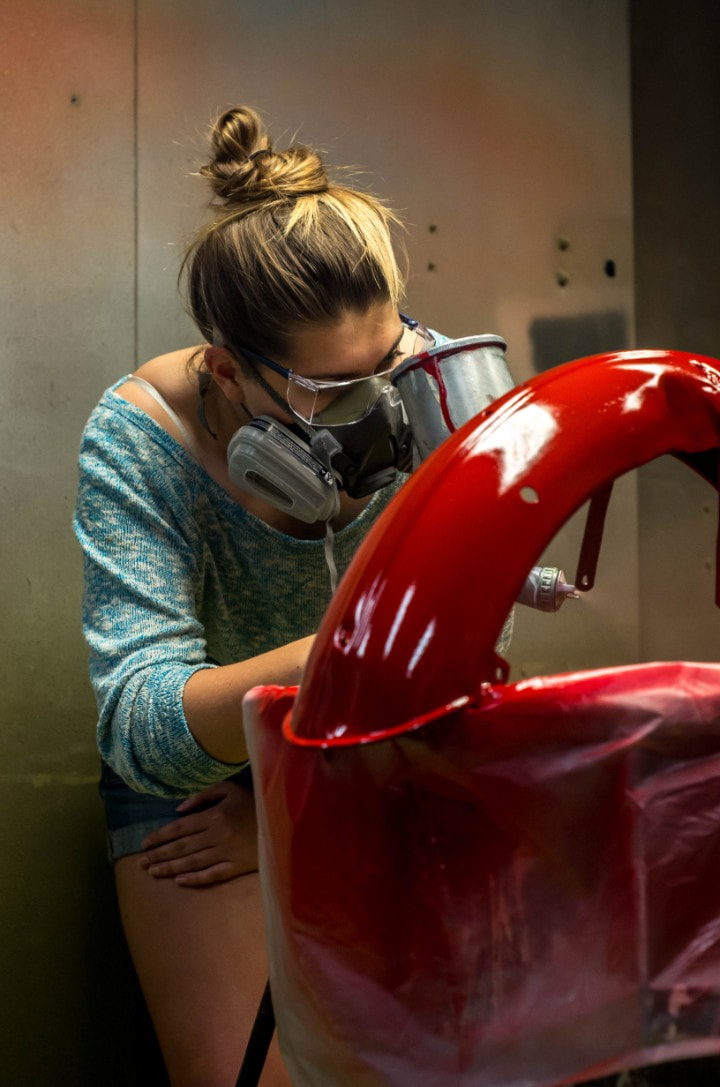
Paint
Before parts were sent out to be powder coated, we had to cover all the threaded holes in the frame so that the paint would not be hardened onto the threads. We also had to paint the mudguards ourselves to match the tank's color.
|
|
|
|
|
|
Carburetor, Gaskets and Fasteners
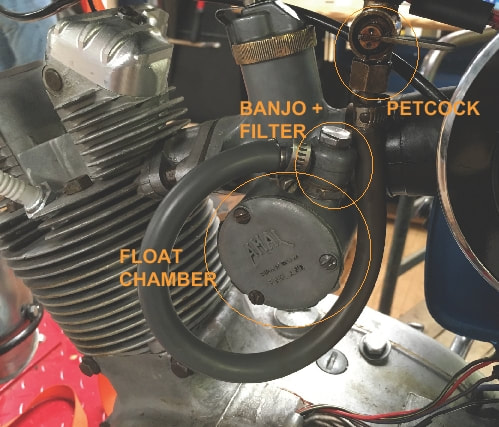
Laura and Elizabeth Carburetor - We used the skeletons of 6 old carburetors (all the same type - Amal Monobloc 376 Series), took inventory of all parts, reassembled and tested it on the blue bike. It leaked gasoline immediately. We determined several areas the leaking could be stemming from: the banjo, the fuel line itself, the petcock, and/or the float chamber. First we added a second gasket to seal the float chamber. Then we noticed that there was a poor seal between the banjo and the filter base (the filter was old), so we put on a new filter and banjo, which worked like a charm. We also fit a new petcock on, as the old one was leaking as well. |
|
Gaskets
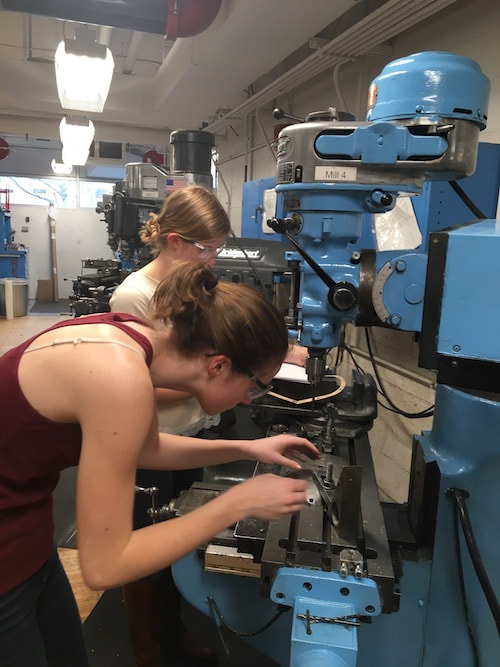
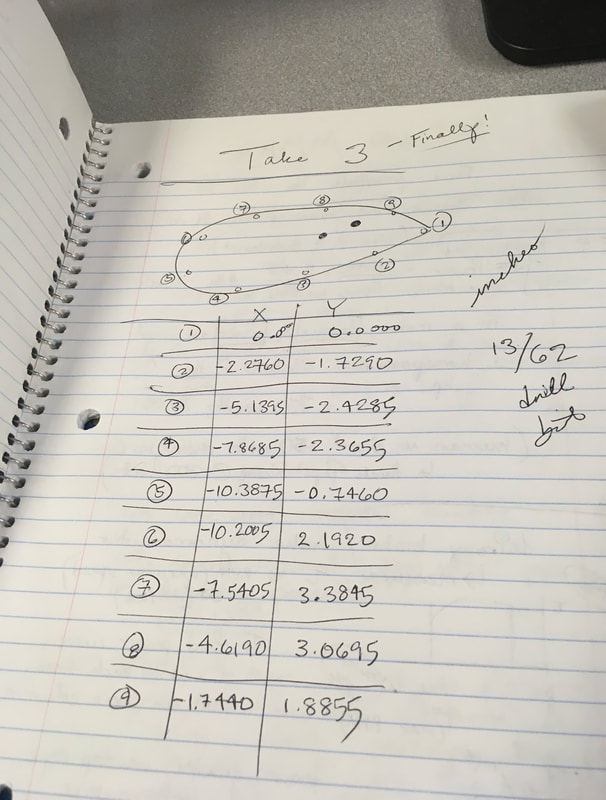
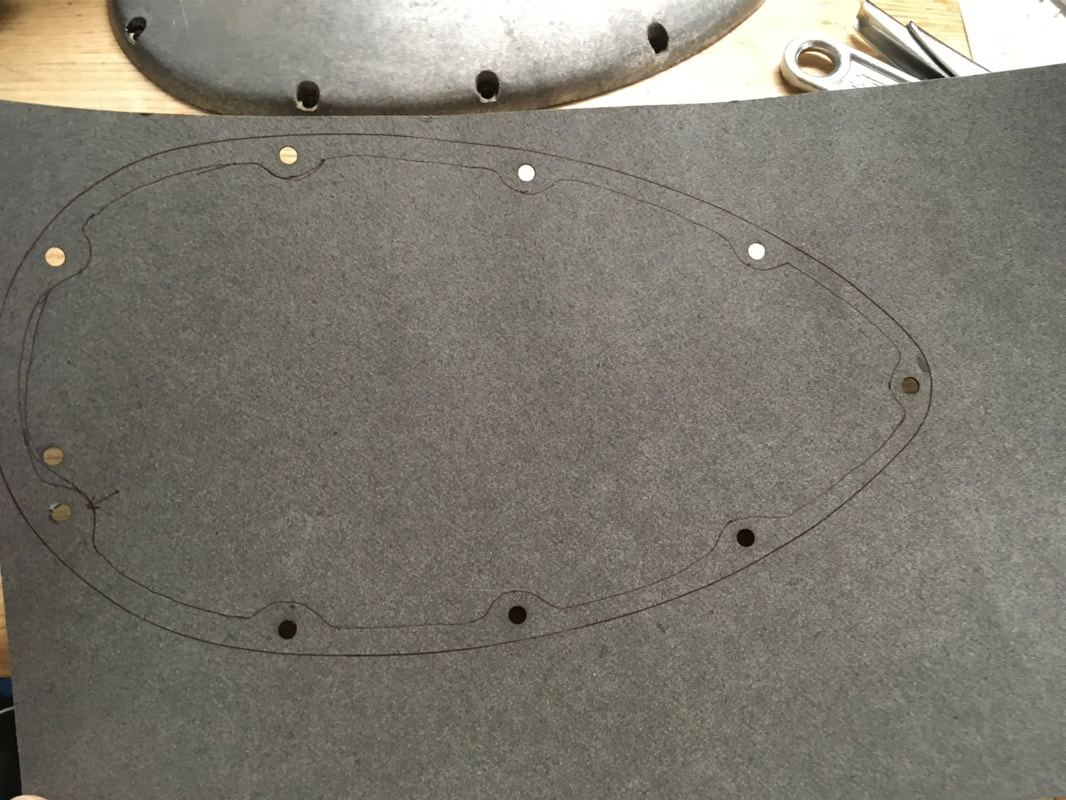
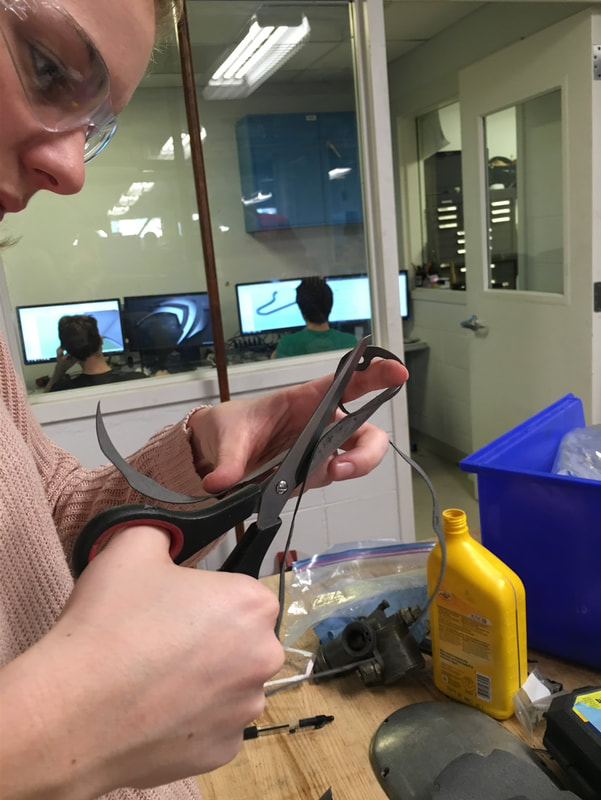
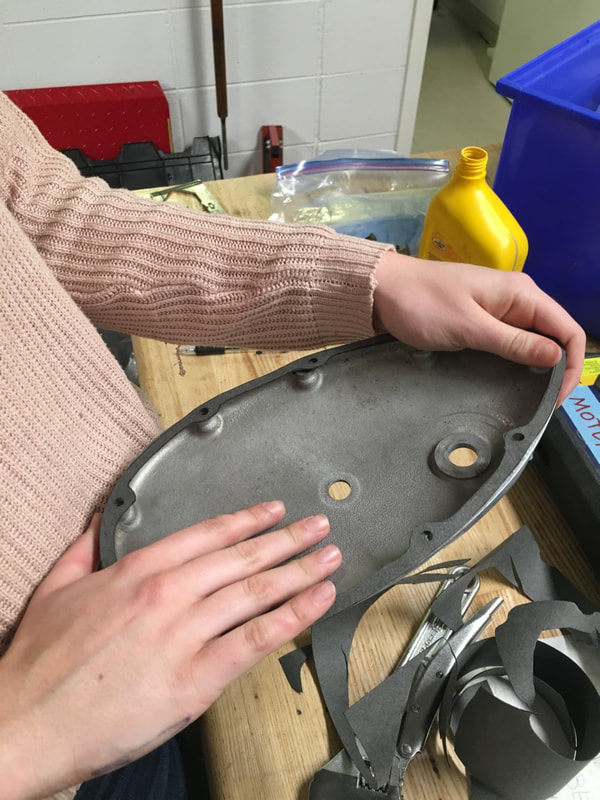
We had to hand make new gaskets for the engine covers of both the timing and clutch sides. To start, Laura and Elizabeth measured the positions of the engine cover holes using the milling machine.
We had to hand make new gaskets for the engine covers of both the timing and clutch sides. To start, Laura and Elizabeth measured the positions of the engine cover holes using the milling machine.
|
|
|
This was a very long process as the mill kept freezing and so in order to get the correct coordinates, we had to try three or four times for each gasket.
|
|
|
|
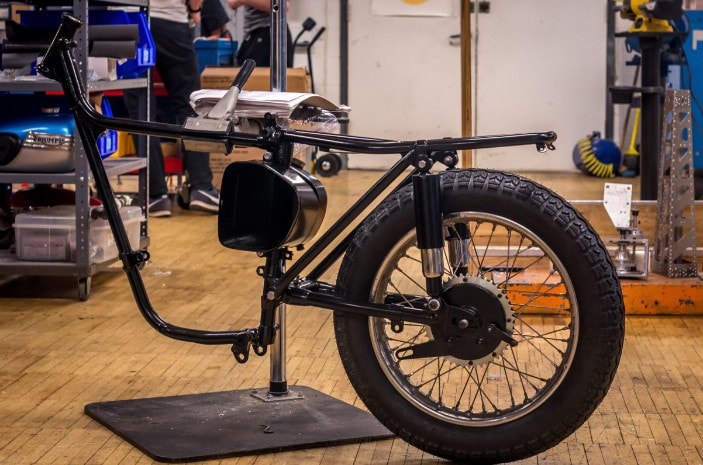
Final Rebuild
|

|
|

|
|